Sorry folks, blogger is doing my head in when it comes to working out how to upload pics from my iPad, so have continued my blog over Here
I hope you enjoy.
Wednesday, 27 August 2014

Saturday, 10 May 2014
Wanaka School & beyond!
This year I had the opportunity to attend the Wanaka School of embroidery.
It was their 30th anniversary & my mum & I headed over for 2 nights & 2 full days of stitching. I chose to do the Or Nue class or Anne Marie Moorhead. She is also the person who designed my Illuminated letter kit, which is still to be finished.
The Or Nue is a nice technique & possibly the last of the gold work I do for a while, as there is still so much for me to learn else where, but here is my result:
I like the postage stamp effect the ric rac gives this small piece & so have decided to take the satchel we got out information in & stitch name etc details on the front & attach this as a postage stamp.
 In the meantime my mum & I have been organising "Stitch-In Saturdays" at her shop. we stated out in the guild rooms, however there were issues & so now we meet ever 2nd & 4th Saturday in the back room of her shop - which is very handy when you run out of supplies - cause there they are!!
Through this I have met one new embroiderer, of a similar age & her sister is also a crafter - I met her only once & she was talking some impressive bead work.
During one of these Saturdays my mum taught a few of us how to crochet & so I have been working on a few things of the crochet kind including a balaclava for my man & now I'm part way through a doily.
With a few things finished I could finally tackle an idea from my own head & here were the supplies:
 this is for the "Post bag colour challenge". this year's theme is Black, White and Grey in between. I am making a Kindle cover. The embroidery is done, next is probably the more challenging task of putting it all together.
It was their 30th anniversary & my mum & I headed over for 2 nights & 2 full days of stitching. I chose to do the Or Nue class or Anne Marie Moorhead. She is also the person who designed my Illuminated letter kit, which is still to be finished.
The Or Nue is a nice technique & possibly the last of the gold work I do for a while, as there is still so much for me to learn else where, but here is my result:
I like the postage stamp effect the ric rac gives this small piece & so have decided to take the satchel we got out information in & stitch name etc details on the front & attach this as a postage stamp.
Through this I have met one new embroiderer, of a similar age & her sister is also a crafter - I met her only once & she was talking some impressive bead work.
During one of these Saturdays my mum taught a few of us how to crochet & so I have been working on a few things of the crochet kind including a balaclava for my man & now I'm part way through a doily.
With a few things finished I could finally tackle an idea from my own head & here were the supplies:
Friday, 9 May 2014
tooo looong
sorry folks, I moved, had computer issues & nearly forgot my password... but I'm still stitching!
Firstly, new furniture to organise some of the stash:
Firstly, new furniture to organise some of the stash:


Thursday, 18 April 2013
Getting a Head
(warning there will be several 'head' puns while I work on this piece)
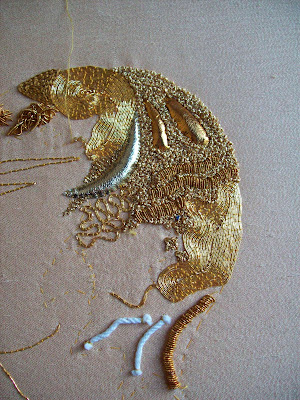
Today I had time to start on this & I decided to start by finishing the techniques which looked unfinished. This allowed less thinking & let me spend some time with the piece which is helping me make future decisions.
Here is what I did today:
And here (as promised) is the updated finishing of the flutterby:
 Over the next few days, i should have more time, in between my part time job, picking my daughter up from school, taking her to my friend in Timaru for the school holidays & then being involved in the local performing arts competitions... then back to work again.
Today I had time to start on this & I decided to start by finishing the techniques which looked unfinished. This allowed less thinking & let me spend some time with the piece which is helping me make future decisions.
Here is what I did today:


Thursday, 11 April 2013
Stitching for Others
my next project is someone elses. A UFO of a lovely inspirational lady, Joan is someone I have known practically my whole life, her husband used to take me to kindy, & they gave me one of my first jobs as a teenager. Joan is kind & patient & I don't recall her ever being cross with me. She has always encouraged my own craftiness & I have several treasured things which she made for me & my daughter.
So to return some kindness, I offered to complete a piece of goldwork for her. Something she hasn't worked on for at least 5 years, due to several moves, reducing eyesight & as she says "impatience with the fine work required".
Here is what she has started:


 & a close up.
Then I got given the box of supplies... oh wow!
 Yikes! no pattern, no set rules... deep breath, challenge accepted! this is pretty exciting, kits make doing a particular technique easier. With rules, step by step instructions, you normally get a pic to show what it 'should' look like at the end... with this it's more up to me. pushing me outside my comfort zone with this technique.
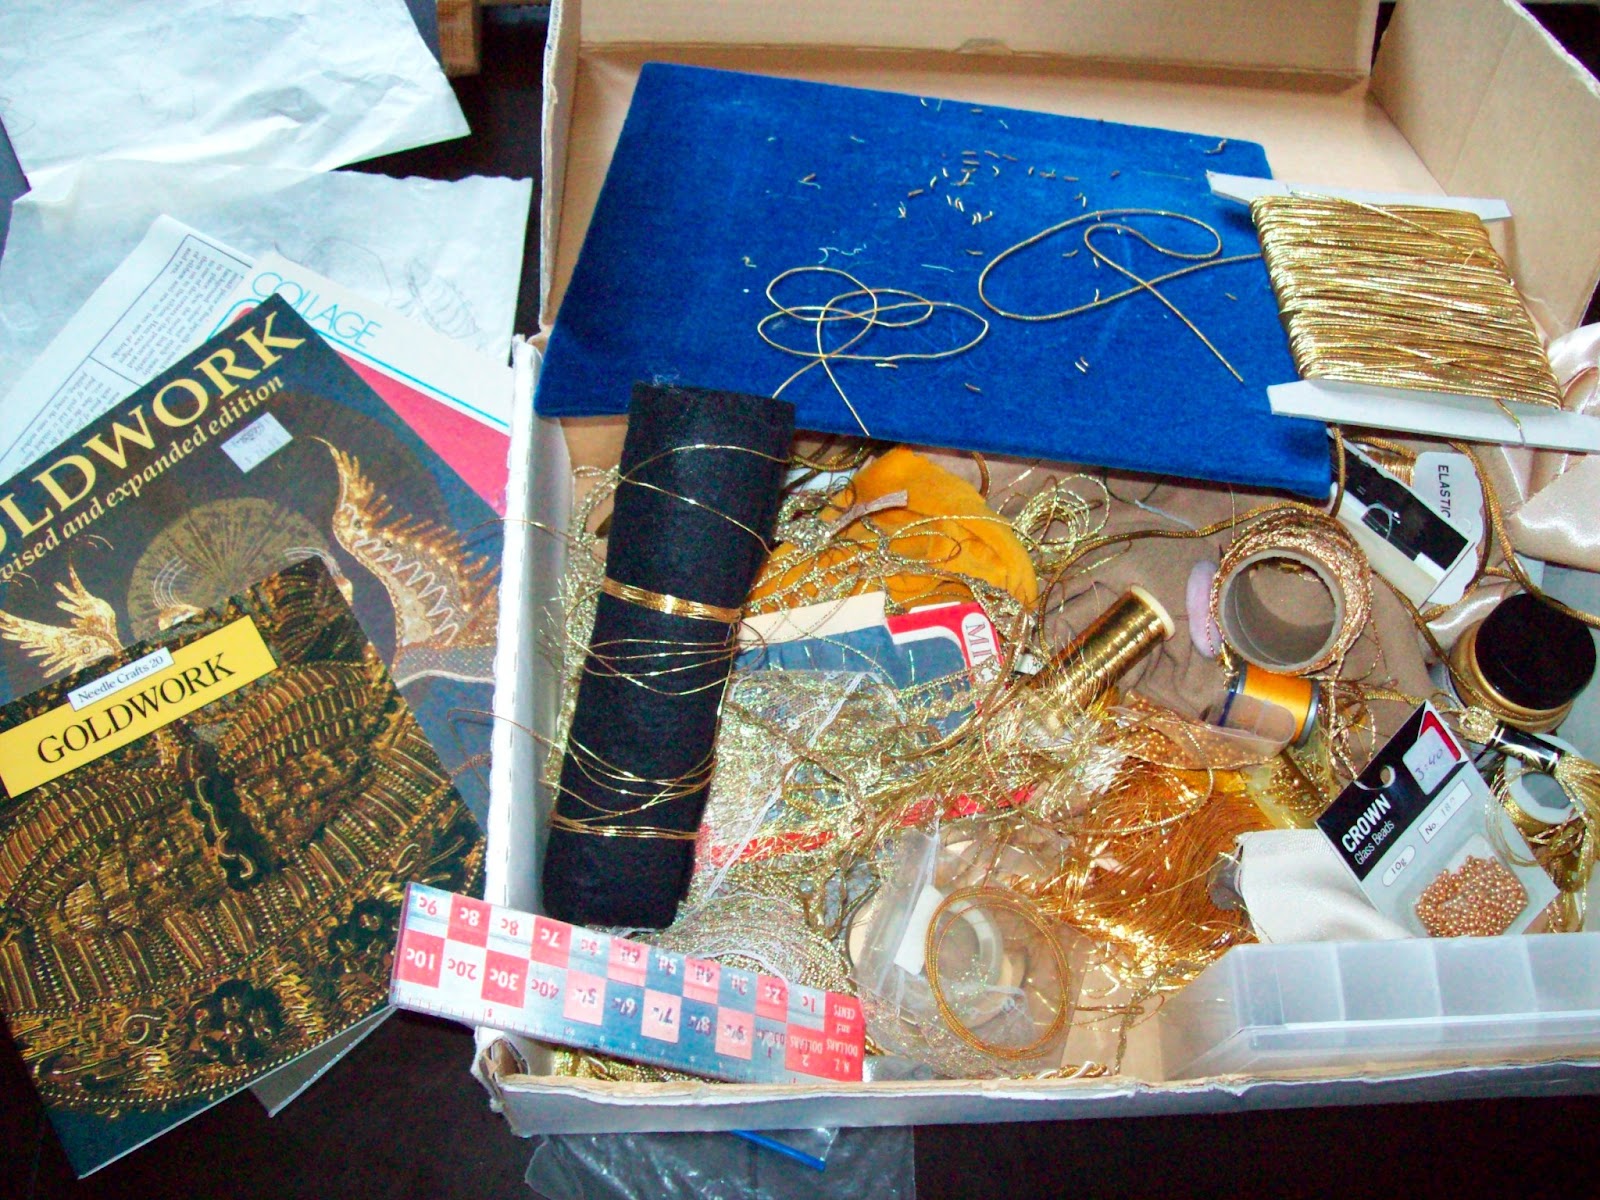
Firstly, I organise...
 one thing I like about this 'Egyptian Head' is that the part which is finer goldwork, is the hair, or as I like to think of it, the Brain. As the brain is segmented into areas, this is lending itself to applying different techniques.
Oh and I have a new tool - proper goldwork scissors, which Mum ordered through the class we took together:
 One of the blades(?) is serrated which should make the cutting of gold thread easier with neater ends.
Oh, and lastly - tip of the week (from Mum) - we are spraying out flutterby & dragonfly with hairspray, to keep them from tarnishing & help them stay nice for longer.
So to return some kindness, I offered to complete a piece of goldwork for her. Something she hasn't worked on for at least 5 years, due to several moves, reducing eyesight & as she says "impatience with the fine work required".
Here is what she has started:


Then I got given the box of supplies... oh wow!
Firstly, I organise...

Oh and I have a new tool - proper goldwork scissors, which Mum ordered through the class we took together:

Oh, and lastly - tip of the week (from Mum) - we are spraying out flutterby & dragonfly with hairspray, to keep them from tarnishing & help them stay nice for longer.
Monday, 8 April 2013
linked and confused
the confused part is not unusual, but the linked thing is kind of cool...
basically I am participating in this:
oooh and I made that work too :)
anyhoo, the post I entered in the competition was my first one I made for this blog - I'm not sure if that is ok, or if the "Tool kit" was supposed to be in this post, but heck, I'm a crafter not an internet guru.

in any case here is what my kit sometimes ends up looking like.
Also I need to do another pic of the butterfly, my mum gave me a suggestion for finishing touches, which I implemented...now she is happy with it & I will get it back off her after guild meeting on Thursday where she wants to show it off.
 In the meantime, here is some more of my letter done, but I am putting this to one side while I finish someone elses UFO.
basically I am participating in this:
oooh and I made that work too :)
anyhoo, the post I entered in the competition was my first one I made for this blog - I'm not sure if that is ok, or if the "Tool kit" was supposed to be in this post, but heck, I'm a crafter not an internet guru.

Also I need to do another pic of the butterfly, my mum gave me a suggestion for finishing touches, which I implemented...now she is happy with it & I will get it back off her after guild meeting on Thursday where she wants to show it off.

Thursday, 28 March 2013
Flutterby Complete
Yah! complete
here is a few of the steps:


so next, I shall go back to my illuminated letter
here is a few of the steps:


All Finished:

Tuesday, 26 March 2013
Flutterby
So it seems this may just be 'Goldwork' year. Sunday I attended a class in Dunedin with Alison Cole.
She has amazing kits & is an excellent teacher.
After making the Ladybug & then having a go at the Illumination letter, it was good to learn some more and spend some time with my Mum as well.
Here is what I did during the class:
 one of the most important lessons I learnt was that I had to complete the rest in a timely manner as the gold threads will tarnish & unless I wanted half my project more tarnished than the other half - chop chop!
Since Monday:


the red is long & short stitch, takes a while, but a nice technique.
 outline all done with the Gilt Pearl Purl #2.
Today I have also done the vein lines, but I need better lighting to get you a pic... tomorrow :)
at some point I will also need to decide what to do with it... may even frame it! *shock*
She has amazing kits & is an excellent teacher.
After making the Ladybug & then having a go at the Illumination letter, it was good to learn some more and spend some time with my Mum as well.
Here is what I did during the class:

Since Monday:


the red is long & short stitch, takes a while, but a nice technique.

Today I have also done the vein lines, but I need better lighting to get you a pic... tomorrow :)
at some point I will also need to decide what to do with it... may even frame it! *shock*
Monday, 25 February 2013
New Tools
With the start of learning Gold-Work came the acquisition of 2 new tools.
Firstly the lap frame (or 'fanny-frame' as my mother likes to call it) proving to be brilliant as it gives me two hands to stitch with.
 the base part simply slides under your leg, giving you support & the frame can be raised, tilted & swung around.
Second tool was a Mellor:

I got this at my Ladybug class, this one is made from stainless steel, here in NZ. otherwise hard to find, when I went googling anyway. It's great for pushing the metal threads into place & for stuffing small areas.
and an update on my letter:
 Silver work all done.
 and here you can see I have satin stitched the top corner motifs over felt which gave padding. Then I realised I needed another one - for the bottom left...
Firstly the lap frame (or 'fanny-frame' as my mother likes to call it) proving to be brilliant as it gives me two hands to stitch with.

Second tool was a Mellor:

and an update on my letter:


Friday, 22 February 2013
Illuminated Letter
Now I'm back into it - with a lap-frame making stitching much easier - I have started a project which I bought the pattern for back at conference last July.
Illuminations for Embroidery, an Annie M. Design. Letter K.
Part of me was reluctant to buy this as in my mind, it kind of looks like a B, but I was swayed as I want to do the technique & I had a voucher for Nancy's to spend. Also they told me that it has the lines top and bottom as this was the medieval thing to do.
So after feeling successful with my first go at gold work, I dug out the pattern & set about ensuring I had the necessary supplies. Firstly, fabric - luckily in my stash I has a beautiful piece of Dupion Silk, exactly the size required - yah!!
 I also had the silver required - purchased with the pattern. Then tried to sort out colours to go for the flowers, leaves & some padding thing & the inside filling of the letter.
Got my carbon-type paper for putting the pattern on fabric, then off to the shops for some calico, and the padding thread. also got some invaluable advice from my Mum to make sure I was on the right path for the colours. (Hurrah for Mum!)
here is the pattern traced on, ready to stitch.
 See - it looks like a B.
And after the morning at the A&P show here is todays work.
 And a close up of the silver...
 I'm not sure I am overly happy with the top & bottom lines, but I will do more of the actual K before I unpick those lines to re-do. I seem to be developing some form of perfectionism, which feels very weird.
Illuminations for Embroidery, an Annie M. Design. Letter K.
Part of me was reluctant to buy this as in my mind, it kind of looks like a B, but I was swayed as I want to do the technique & I had a voucher for Nancy's to spend. Also they told me that it has the lines top and bottom as this was the medieval thing to do.
So after feeling successful with my first go at gold work, I dug out the pattern & set about ensuring I had the necessary supplies. Firstly, fabric - luckily in my stash I has a beautiful piece of Dupion Silk, exactly the size required - yah!!

Got my carbon-type paper for putting the pattern on fabric, then off to the shops for some calico, and the padding thread. also got some invaluable advice from my Mum to make sure I was on the right path for the colours. (Hurrah for Mum!)
here is the pattern traced on, ready to stitch.

And after the morning at the A&P show here is todays work.


Sunday, 17 February 2013
Back to Stitching
Yah! back to stitching :)
there has been much moving around, getting settled & finding places for stuff, including my craft stuff. Even working out where I want to work on craft & how that will work in a new home.
The best thing, still, is my mum. She enrolled me in a class to make a 'gold-work' brooch, before I even moved down & that class has given me the push I needed.
here is what I did...


there has been much moving around, getting settled & finding places for stuff, including my craft stuff. Even working out where I want to work on craft & how that will work in a new home.
The best thing, still, is my mum. She enrolled me in a class to make a 'gold-work' brooch, before I even moved down & that class has given me the push I needed.
here is what I did...


Above is my progress through day 1

this is my finished Lady-bird brooch
"Gold-work" is the technique, although I prefer silver & so choose to use silver metal threads.

This is what my Mum made - apologies for the terrible pic, I was using my cell phone.

And now inspired I did this last night. I now have a lap-frame, which makes stitching easier than ever!
Monday, 3 December 2012
Moved
Wow! it has been ages since my last update & loads has happened.
Short version: went to Mary Poppins in Auckland, traveling with a great friend, catching up with great friends along the way & having a magical time!
Moved to Oamaru, where I have things spread between my Mothers & my boyfriend's homes - at least I know where my craft stuff is!
Celebrated my Birthday & now we prepare for Xmas. Oh and I did start a new job, well, kind of 2 new jobs really... one for the government with regular hours although only part time & the other in my mothers shop, where I do her books & help in the shop from time to time.
Most importantly I have been stitching. Firstly something I had been talking about for a few months now:

 I call these "Spanky Hankys" just in case you can't read the words on the hanky.
I have also been working on my sisters Xmas pressie, but cant post pics til after the giving & some Xmas cards, which I should also take pics of to share.
Oh, and for my birthday my darling mother gave me several embroidery items mostly around the Crewel theme, as this is what I'd like to try my hand at next & some Elizabethan embroidery books.
I really need to finish off my Xmas cards next & then do some more work on my little house, but without my own set space for stitching, I feel a bit out of sorts... I'll get there though.
Short version: went to Mary Poppins in Auckland, traveling with a great friend, catching up with great friends along the way & having a magical time!
Moved to Oamaru, where I have things spread between my Mothers & my boyfriend's homes - at least I know where my craft stuff is!
Celebrated my Birthday & now we prepare for Xmas. Oh and I did start a new job, well, kind of 2 new jobs really... one for the government with regular hours although only part time & the other in my mothers shop, where I do her books & help in the shop from time to time.
Most importantly I have been stitching. Firstly something I had been talking about for a few months now:


I have also been working on my sisters Xmas pressie, but cant post pics til after the giving & some Xmas cards, which I should also take pics of to share.
Oh, and for my birthday my darling mother gave me several embroidery items mostly around the Crewel theme, as this is what I'd like to try my hand at next & some Elizabethan embroidery books.
I really need to finish off my Xmas cards next & then do some more work on my little house, but without my own set space for stitching, I feel a bit out of sorts... I'll get there though.
Tuesday, 23 October 2012
Pause for now
stitching has taken a short pause.
I'm moving. In 18 days. to the other island. in 18 days.
Fortunately I finish my current job in 3 days. then I have 2 weeks, but in the middle, I have a friend staying & she, my daughter & I are traveling to Auckland (8 hour drive) to see Mary Poppins. We will take a few days to do so, visiting people along the way. But at this point I'm not sure where I will fit any stitching in.
Let alone time to update the blog... maybe Wednesday?
Just know I haven't forgotten you!

I'm moving. In 18 days. to the other island. in 18 days.
Fortunately I finish my current job in 3 days. then I have 2 weeks, but in the middle, I have a friend staying & she, my daughter & I are traveling to Auckland (8 hour drive) to see Mary Poppins. We will take a few days to do so, visiting people along the way. But at this point I'm not sure where I will fit any stitching in.
Let alone time to update the blog... maybe Wednesday?
Just know I haven't forgotten you!

Sunday, 30 September 2012
Done n Dusted
I did something with one of the pieces of 'fabric' we made the other month - yah!


in other news, my Mum is booking me into 2 classes for next year already :) one is a day in Dunedin with Alison Cole doing some gold work & the other class will be at her guild... or soon to be my new guild! Oh in case you missed the memo - I'm moving to Oamaru in December :)
Tuesday, 11 September 2012
Sometimes the hardest choice is making one
a minor detour to my project was had, but this only took me 3 days & then was posted off to the person who is putting loads of these together to create a larger display? I think, I dont really know the whole story, but happy to be distracted by something little that took very little brain effort (compared to my other project).
 then back into the main project... the thimble holder - although I have only done the outside parts, there is still the lid lining to be done, but that has to be done on different materials & I haven't chosen that yet, so it will just have to wait.
Here are the top and base:


And to give you an idea of size, here is the 3 pieces together
 So now I have to decide the next pieces to do: Needlebook, Spool holder, or Tape Measure holder... I'm just not ready to face the Beaded thread counter or the Thread Cutter cover - yikes! Don't even think about the actual box!

Here are the top and base:

here is what the sides will be:


Subscribe to:
Posts (Atom)