my next project is someone elses. A UFO of a lovely inspirational lady, Joan is someone I have known practically my whole life, her husband used to take me to kindy, & they gave me one of my first jobs as a teenager. Joan is kind & patient & I don't recall her ever being cross with me. She has always encouraged my own craftiness & I have several treasured things which she made for me & my daughter.
So to return some kindness, I offered to complete a piece of goldwork for her. Something she hasn't worked on for at least 5 years, due to several moves, reducing eyesight & as she says "impatience with the fine work required".
Here is what she has started:
& a close up.
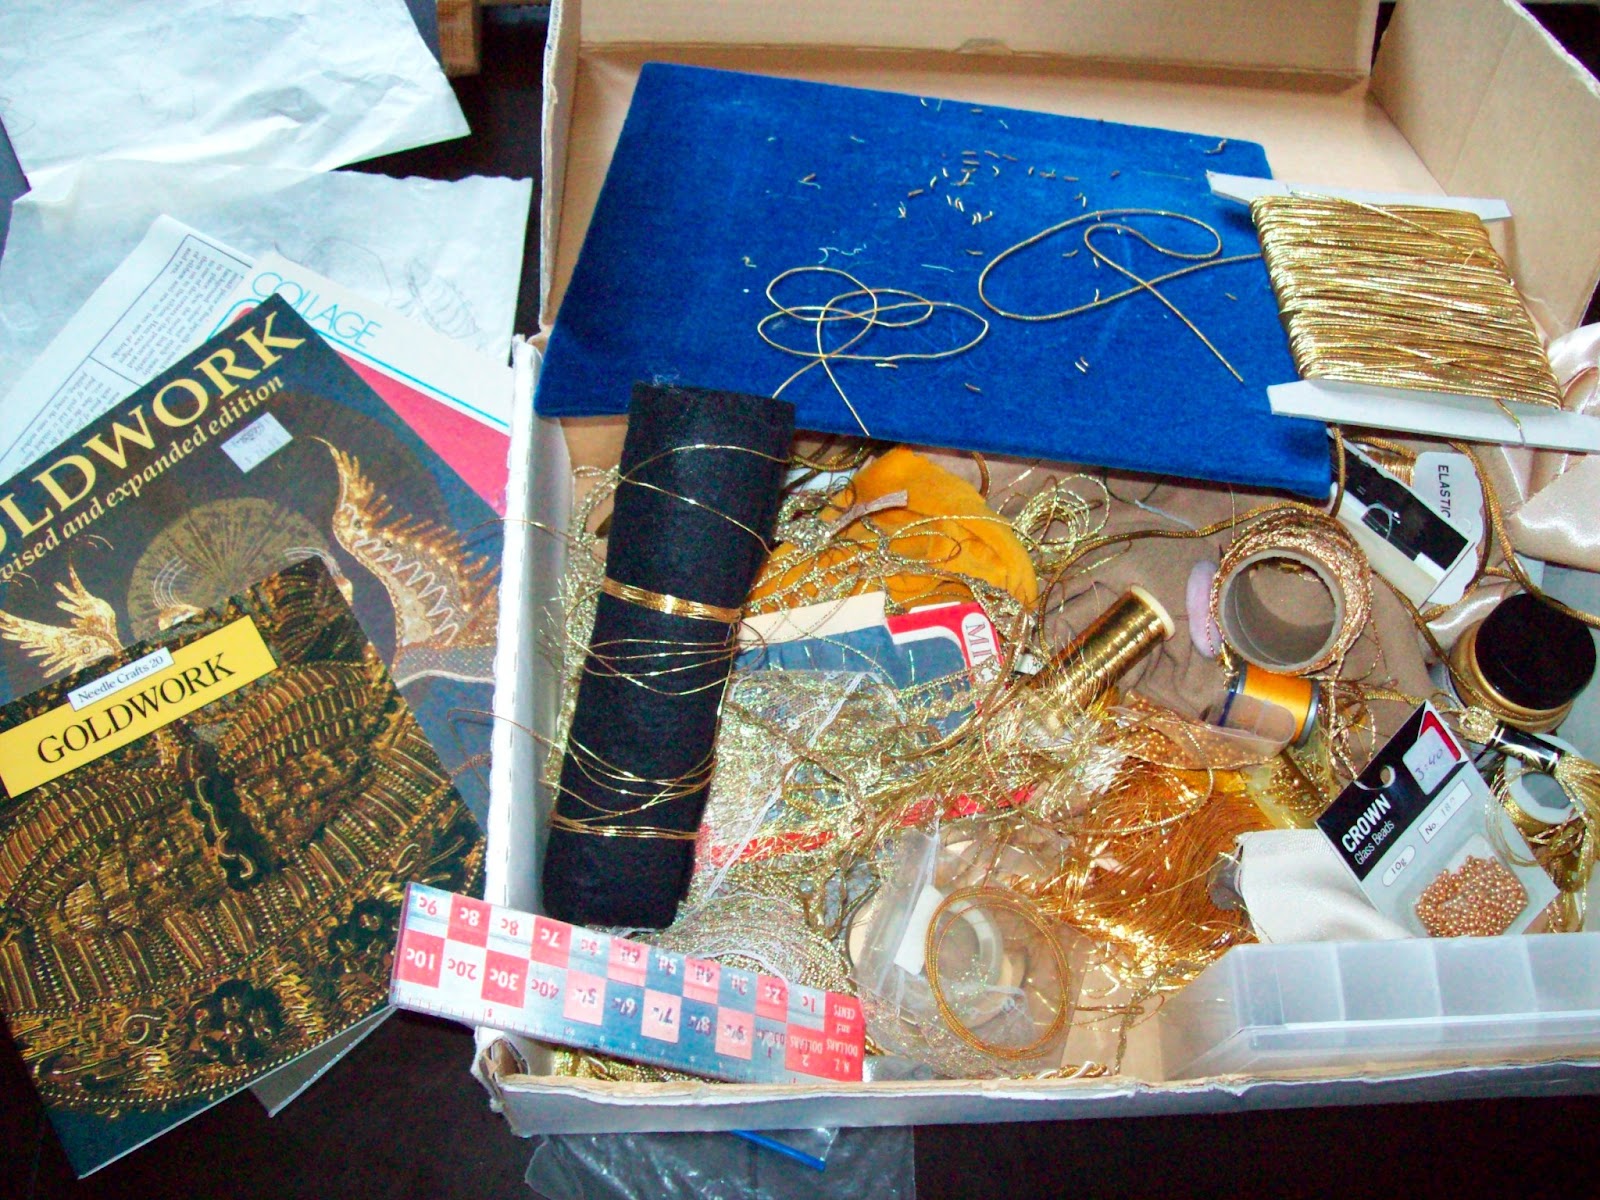
Then I got given the box of supplies... oh wow!
Yikes! no pattern, no set rules... deep breath, challenge accepted! this is pretty exciting, kits make doing a particular technique easier. With rules, step by step instructions, you normally get a pic to show what it 'should' look like at the end... with this it's more up to me. pushing me outside my comfort zone with this technique.
Firstly, I organise...
one thing I like about this 'Egyptian Head' is that the part which is finer goldwork, is the hair, or as I like to think of it, the Brain. As the brain is segmented into areas, this is lending itself to applying different techniques.
Oh and I have a new tool - proper goldwork scissors, which Mum ordered through the class we took together:
One of the blades(?) is serrated which should make the cutting of gold thread easier with neater ends.
Oh, and lastly - tip of the week (from Mum) - we are spraying out flutterby & dragonfly with hairspray, to keep them from tarnishing & help them stay nice for longer.
Showing posts with label Embroidery. Show all posts
Thursday, 11 April 2013
Monday, 8 April 2013
linked and confused
the confused part is not unusual, but the linked thing is kind of cool...
basically I am participating in this:
oooh and I made that work too :)
anyhoo, the post I entered in the competition was my first one I made for this blog - I'm not sure if that is ok, or if the "Tool kit" was supposed to be in this post, but heck, I'm a crafter not an internet guru.
in any case here is what my kit sometimes ends up looking like.
Also I need to do another pic of the butterfly, my mum gave me a suggestion for finishing touches, which I implemented...now she is happy with it & I will get it back off her after guild meeting on Thursday where she wants to show it off.
In the meantime, here is some more of my letter done, but I am putting this to one side while I finish someone elses UFO.
basically I am participating in this:
oooh and I made that work too :)
anyhoo, the post I entered in the competition was my first one I made for this blog - I'm not sure if that is ok, or if the "Tool kit" was supposed to be in this post, but heck, I'm a crafter not an internet guru.
Also I need to do another pic of the butterfly, my mum gave me a suggestion for finishing touches, which I implemented...now she is happy with it & I will get it back off her after guild meeting on Thursday where she wants to show it off.
In the meantime, here is some more of my letter done, but I am putting this to one side while I finish someone elses UFO.
Tuesday, 26 March 2013
Flutterby
So it seems this may just be 'Goldwork' year. Sunday I attended a class in Dunedin with Alison Cole.
She has amazing kits & is an excellent teacher.
After making the Ladybug & then having a go at the Illumination letter, it was good to learn some more and spend some time with my Mum as well.
Here is what I did during the class:
one of the most important lessons I learnt was that I had to complete the rest in a timely manner as the gold threads will tarnish & unless I wanted half my project more tarnished than the other half - chop chop!
Since Monday:
the red is long & short stitch, takes a while, but a nice technique.
outline all done with the Gilt Pearl Purl #2.
Today I have also done the vein lines, but I need better lighting to get you a pic... tomorrow :)
at some point I will also need to decide what to do with it... may even frame it! *shock*
She has amazing kits & is an excellent teacher.
After making the Ladybug & then having a go at the Illumination letter, it was good to learn some more and spend some time with my Mum as well.
Here is what I did during the class:
one of the most important lessons I learnt was that I had to complete the rest in a timely manner as the gold threads will tarnish & unless I wanted half my project more tarnished than the other half - chop chop!
Since Monday:
the red is long & short stitch, takes a while, but a nice technique.
outline all done with the Gilt Pearl Purl #2.
Today I have also done the vein lines, but I need better lighting to get you a pic... tomorrow :)
at some point I will also need to decide what to do with it... may even frame it! *shock*
Friday, 22 February 2013
Illuminated Letter
Now I'm back into it - with a lap-frame making stitching much easier - I have started a project which I bought the pattern for back at conference last July.
Illuminations for Embroidery, an Annie M. Design. Letter K.
Part of me was reluctant to buy this as in my mind, it kind of looks like a B, but I was swayed as I want to do the technique & I had a voucher for Nancy's to spend. Also they told me that it has the lines top and bottom as this was the medieval thing to do.
So after feeling successful with my first go at gold work, I dug out the pattern & set about ensuring I had the necessary supplies. Firstly, fabric - luckily in my stash I has a beautiful piece of Dupion Silk, exactly the size required - yah!!
I also had the silver required - purchased with the pattern. Then tried to sort out colours to go for the flowers, leaves & some padding thing & the inside filling of the letter.
Got my carbon-type paper for putting the pattern on fabric, then off to the shops for some calico, and the padding thread. also got some invaluable advice from my Mum to make sure I was on the right path for the colours. (Hurrah for Mum!)
here is the pattern traced on, ready to stitch.
See - it looks like a B.
And after the morning at the A&P show here is todays work.
And a close up of the silver...
I'm not sure I am overly happy with the top & bottom lines, but I will do more of the actual K before I unpick those lines to re-do. I seem to be developing some form of perfectionism, which feels very weird.
Illuminations for Embroidery, an Annie M. Design. Letter K.
Part of me was reluctant to buy this as in my mind, it kind of looks like a B, but I was swayed as I want to do the technique & I had a voucher for Nancy's to spend. Also they told me that it has the lines top and bottom as this was the medieval thing to do.
So after feeling successful with my first go at gold work, I dug out the pattern & set about ensuring I had the necessary supplies. Firstly, fabric - luckily in my stash I has a beautiful piece of Dupion Silk, exactly the size required - yah!!
I also had the silver required - purchased with the pattern. Then tried to sort out colours to go for the flowers, leaves & some padding thing & the inside filling of the letter.
Got my carbon-type paper for putting the pattern on fabric, then off to the shops for some calico, and the padding thread. also got some invaluable advice from my Mum to make sure I was on the right path for the colours. (Hurrah for Mum!)
here is the pattern traced on, ready to stitch.
See - it looks like a B.
And after the morning at the A&P show here is todays work.
And a close up of the silver...
I'm not sure I am overly happy with the top & bottom lines, but I will do more of the actual K before I unpick those lines to re-do. I seem to be developing some form of perfectionism, which feels very weird.
Saturday, 16 June 2012
My Mums test piece
Recently I have been working on a piece which my mother is teaching next year at the Wanaka Embroidery School, so if you like it you can have a go there :)
As she has only taught to her local guild members I offered to test her written instructions - at the moment I am good at this task as I am still learning a lot, yet am pretty good (if I do say so myself) at reading & learning stitches. I have also timed each step so she can ensure enough is taught.
This is inspired from a pattern she purchased in Canada & has adapted:
it has been a bit tricky choosing the right threads for each piece, but all part of the learning curve & ensuring I had enough thread for the parts I choose. There were a couple of times where I found the incorrect way to do one stitch several times.
As she has only taught to her local guild members I offered to test her written instructions - at the moment I am good at this task as I am still learning a lot, yet am pretty good (if I do say so myself) at reading & learning stitches. I have also timed each step so she can ensure enough is taught.
This is inspired from a pattern she purchased in Canada & has adapted:
Saturday, 19 May 2012
Sample Book Complete
all done, all put together, ready to give... after I show it off to people :)
We had a work day in Upper Hutt yesterday, I love the way these work days always have a table of things that the local guild ladies donate & sell very cheaply. I got a piece of linen 90cm x 75cm in green - pretty cool, thought I would be able to use it for my class when I go to conference, asked the lady there what count she thought it was & she said to measure an inch is the length of some part of her finger, which she then counted the threads - 30 - yah, I'd been having a hard time finding any 30count, so then at the other stalls I bought the threads required to match... all set!
Until this morning, when I started to tack out the required griding, I remeasured - with a tape measure - & it's a 38count... grrrrrr. Luckily I realised that my Mum had given me some 30 count (& had the count written in pencil on the hem) for making my house, but there is a lot of material there & I think I might even use some of the green on that... maybe.
So now I need to buy more threads to match this correct fabric.
Next project I think will be the project for my Mum, testing her instructions.
Until this morning, when I started to tack out the required griding, I remeasured - with a tape measure - & it's a 38count... grrrrrr. Luckily I realised that my Mum had given me some 30 count (& had the count written in pencil on the hem) for making my house, but there is a lot of material there & I think I might even use some of the green on that... maybe.
So now I need to buy more threads to match this correct fabric.
Next project I think will be the project for my Mum, testing her instructions.
Sunday, 22 April 2012
Ukrainian update!
as the days get shorter, I get to spend more time on my Ukrainian Whitework - yah!
finished all the needle weaving along the edges & now the corners, first I have to pull one thread & weave the next one back into the fabric.
look how tidy it looks - wouldn't even be able to tell there are threads pulled out :)
Then there is more border to do & button holes around the square & some fancy looking threads stitched in.
my next step is some kind of weaving thing in the corners to kind of look like a web. Then the mitre of corners & final hemming. Good thing I am going to an embroidery guild meeting with my Mum on Wednesday :)
Saturday, 27 August 2011
Week of Awesome!
although it has been two weeks really.
Last weekend I was off to our work annual conference where our team won "Dealer of the Year" this was a huge surprise & amazing feeling to be told you are part of the best team in NZ.
This has slowly sunk in with help from two of the most delicious cakes supplied by our suppliers :)
Then on Monday my best crafty friend arrived from Chch & I took Wednesday& half of Thursday off work to Craft shop with her & do general craftiness. We scoured Wellington's crafty shops & this was a real treat for me as I dont get a chance to get out to many of these places. I think the two best places we went to were 'Thimbles & Threads' in Upper Hutt & the new & improved 'Pete's Emporium' in Porirua. Although Petone's 'Villagebeads' deserves a mention for having the very best fudge I have ever tasted (& they have free tastings). I have to go back there soon, as I am already out.
Wednesday I made this:
it is a scarf, it did look like a ball of wool when I started. This is for my final FB handmade gift - yah! mission complete :)
Today I went to my Thimble Pod class, & so now need to finish that... here is part of what I have so far:
& a close up of the Strawberry:
I'm quite please so far, although some of this is brain scratching, after today I feel quite confident at finishing it - hopefully within the next week.
Last weekend I was off to our work annual conference where our team won "Dealer of the Year" this was a huge surprise & amazing feeling to be told you are part of the best team in NZ.
This has slowly sunk in with help from two of the most delicious cakes supplied by our suppliers :)
Then on Monday my best crafty friend arrived from Chch & I took Wednesday& half of Thursday off work to Craft shop with her & do general craftiness. We scoured Wellington's crafty shops & this was a real treat for me as I dont get a chance to get out to many of these places. I think the two best places we went to were 'Thimbles & Threads' in Upper Hutt & the new & improved 'Pete's Emporium' in Porirua. Although Petone's 'Villagebeads' deserves a mention for having the very best fudge I have ever tasted (& they have free tastings). I have to go back there soon, as I am already out.
Wednesday I made this:
it is a scarf, it did look like a ball of wool when I started. This is for my final FB handmade gift - yah! mission complete :)
Today I went to my Thimble Pod class, & so now need to finish that... here is part of what I have so far:
& a close up of the Strawberry:
I'm quite please so far, although some of this is brain scratching, after today I feel quite confident at finishing it - hopefully within the next week.
Thursday, 21 April 2011
Getting Started
There are so many things to do in life, that sometimes it can be hard to find the time to learn things our mother's just seemed to know.
If you want to get stitching, here are a few things I find invaluable, although not all absolutely required.
Firstly, how to get started?
I clean my house first, that way I feel good that I have done a chore, before settling down to something for me. Also it means that I have clean surfaces for where my work goes & less distractions.
Then I have a coffee & something to eat:
then wash hands - always try to have clean hands before starting.
Inspiration can come from many places, including blogs, websites & books...
A couple of things I find, just make the job easier are a good iron & ironing board cover. I don't overly like ironing & mostly have one for sewing, so why not Pink?
my ironing board cover came from a home & garden show & is super thick - makes ironing even easier!
Sewing machine... I got my first sewing machine when I was about 4 or 5, it was plastic & really worked... until the needle broke :(
Then for my 21st (I think) my Mum bought me this one, which was second-hand & fully reconditioned. I don't use it often, but it still goes & fairly well - not too fancy, does what I want it to do.
And as I am a chronic multi-tasker & mostly organised person, these zip lock bags have been great to keep almost a whole project together.
As you can see i have the above project on the go... but for Easter my amazing mother gave me this:
looking forward to starting.. although there are parts which have me scratching my head... but I'll get there - the woman who made this kit, has a blog - which I will link to, & is a member of the North Otago Embroiderers Guild (with my Mum).
Subscribe to:
Posts (Atom)